
Do Your Students Need Convection Currents Explained? Use This Simple and Engaging Lab!
Are you looking for ways to have convection currents explained to your students? You can show convection currents in several different ways.
Let’s talk about a lab that demonstrates how convection currents work!
In this post
We are going to go over convection currents and when we teach them in Science class. I will also share one of my favorite labs I like to do in my classes to show my students how convection currents work.
And remember to get your free guide 7 Daily Must-Do Routines to Run Your Classroom Like a Pro!

When to teach convection currents
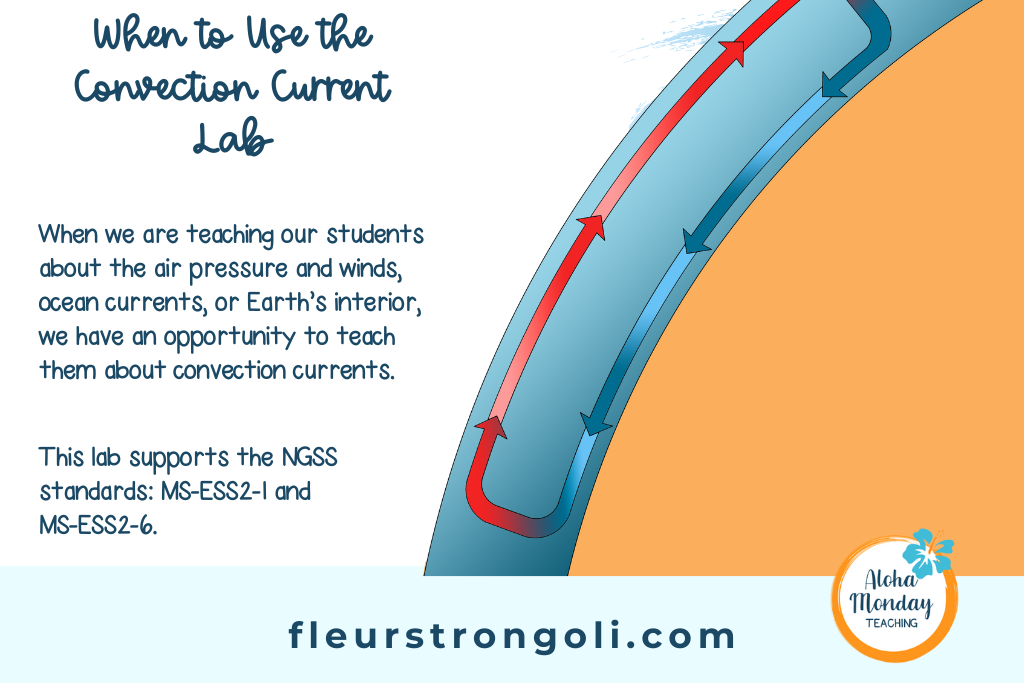
Convection currents come up a lot in Science class, and it can be supported by these two NGSS standards:
MS-ESS2-1. Develop a model to describe the cycling of Earth’s materials and the flow of energy that drives this process.
MS-ESS2-6. Develop and use a model to describe how unequal heating and rotation of the Earth cause patterns of atmospheric and oceanic circulation that determine regional climates.
When we are teaching our students about the air pressure and winds, ocean currents, or Earth’s interior, we have an opportunity to teach them about convection currents.
Convection is how heat transfers through liquid or gas. Hotter material will rise because it is less dense, while the cooler material sinks because it is more dense.
We see this in the atmosphere when we teach students about air pressure and winds. Cooler air from the poles sinks and moves toward the warmer air at the equator. The warm air at the equator rises and moves towards the poles. This causes the convection currents and cells that form global winds.
In the ocean, cold (and salty) water at the poles sinks to form deep ocean currents. This moves around the ocean floor, forming the global conveyor belt. When the water warms near the equator, it rises.
And in the mantle, cooler rock in the lithosphere sinks while hotter rock near the core rises. We teach this to show how matter is moving in Earth’s interior and how rocks and minerals are formed.
Convection Lab
There are many convection labs you can do with your students. This is one I enjoy doing with my students to show them how heat is transferred through liquid.
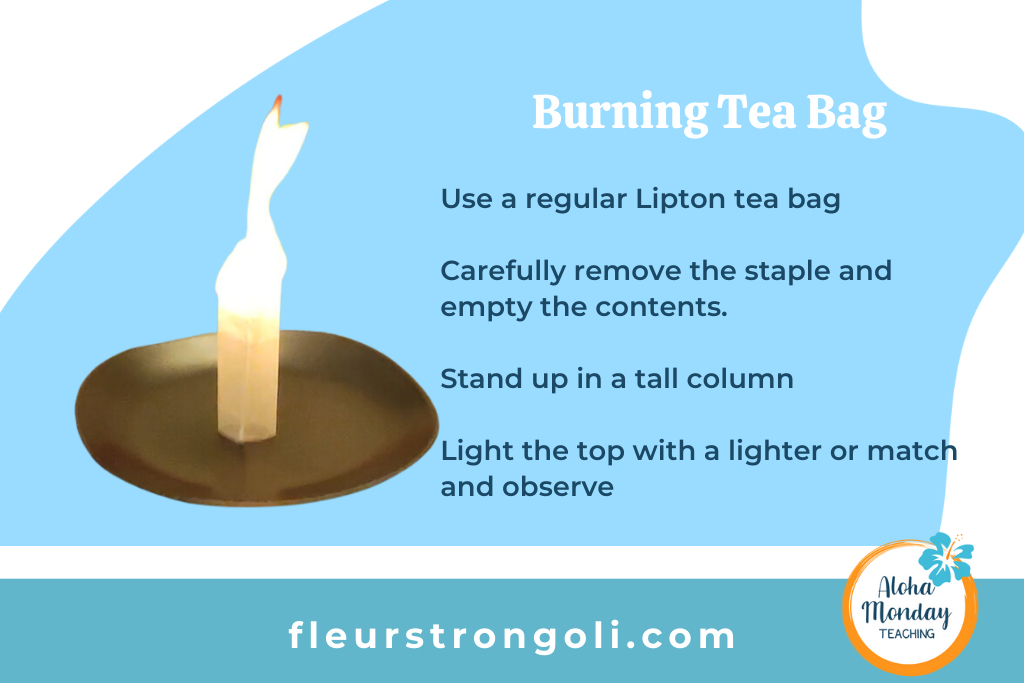
A great demo or lab to begin with is the burning tea bag. The heat from the column creates a convection current, pushing the ashes of the tea bag up into the air.
Another demo uses a paper plate (cut up in spiral pattern) and a hot plate. I use the heat from the hot plate to show the heat transferring through gas and spinning the spiral plate.
You can also put a beaker or container of water on a burner. Add some food coloring to the bottom. Put an ice cube at the top with a different color food coloring and observe.
Then we do this lab. I like to do this toward the beginning of the year during our weather and climate unit or our Earth’s interior unit (whichever is first) for two reasons. First, they gain an understanding of convection currents. And second, I always refer to it since it is now their background knowledge.
Click here to get the convection lab in my TpT store. You’ll get the Power Point, lab sheet, and a lesson plan with a shopping list.
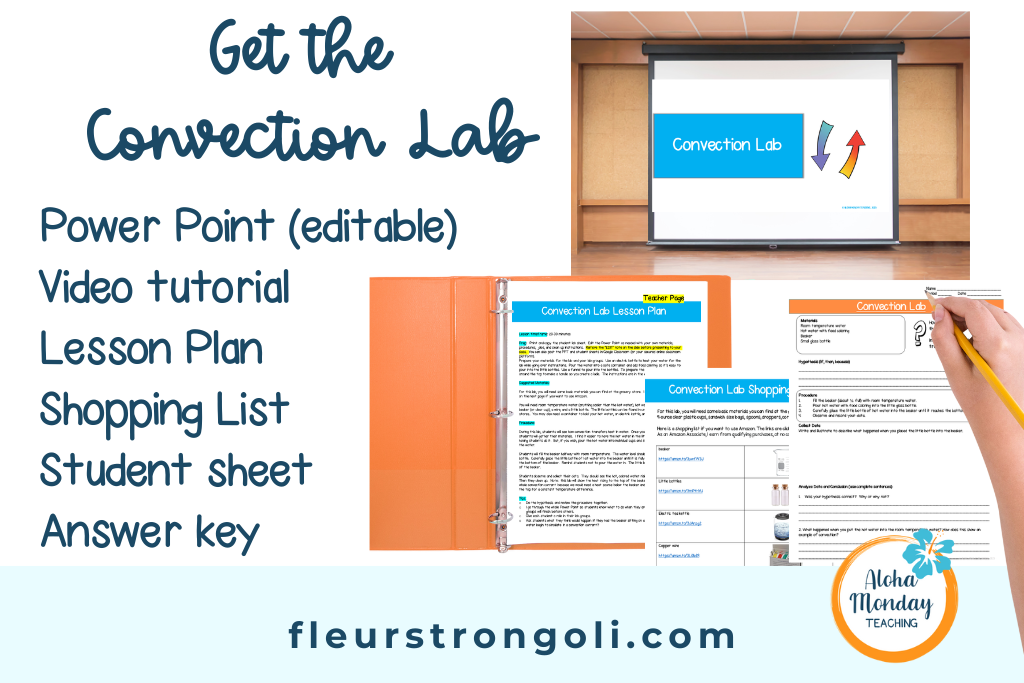
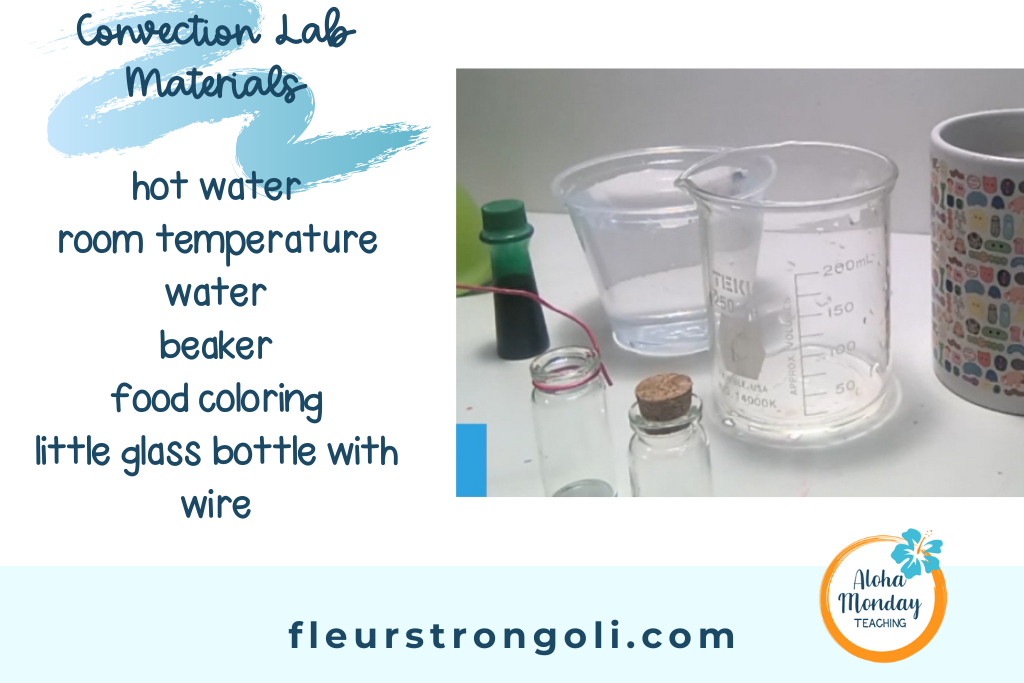
Lab Materials
The materials you need include a beaker, a small glass bottle, wire, hot water, room temperature water, and food coloring. I use an electric tea kettle to heat up my water. You may also want a cup to hold the hot water and a funnel to pour the hot water into the small glass bottle.
Lab Preparation
To prepare for the lab, heat the water just before students gather materials. Add food coloring to the hot water. Wrap wire around the small glass bottle to create a ladle. Place all of the materials on a tray.
Conducting the Lab with Students
I use a PowerPoint for each lab I do with students. This gives them a visual of each part of the lab along with directions for conducting the lab and cleaning up. Read more about managing labs in this blog post.
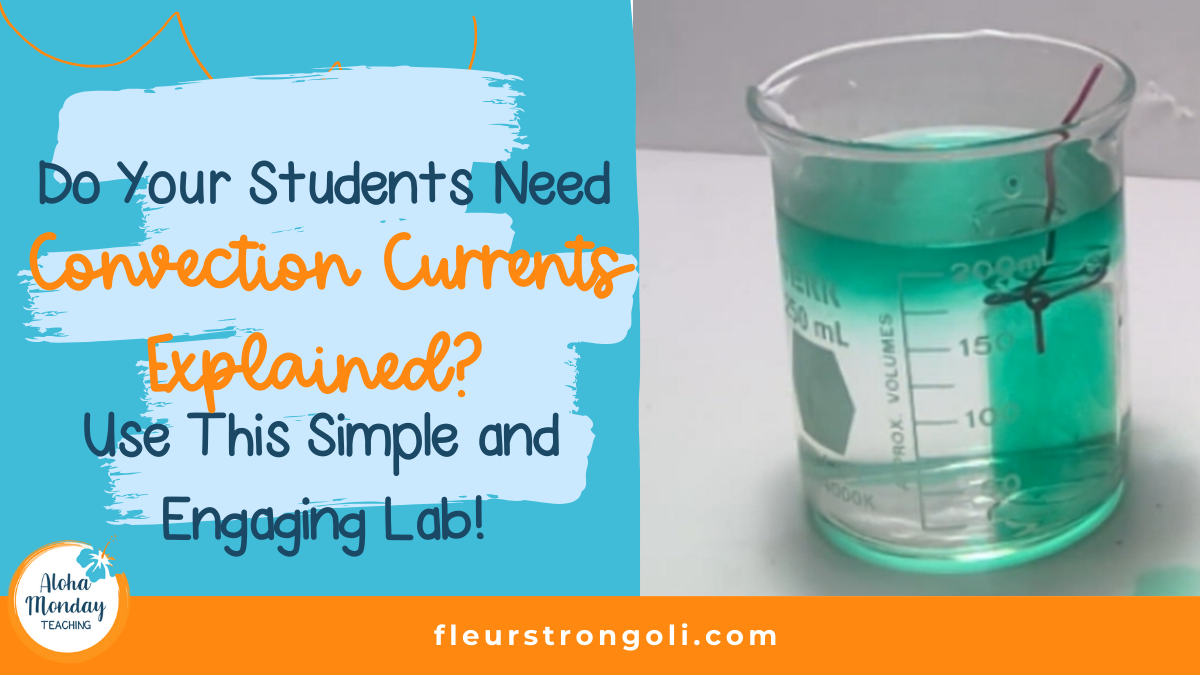
Students will fill the beaker with room temperature (or cooler) water. Then they will slowly lower the glass bottle into the beaker until it is submerged. They should not pour it in. The glass bottle should sit at the bottom of the beaker.
Students should see convection taking place. The hot, colored water will rise out of the glass bottle into the rest of the water. They might even see it sink when it reaches the top of the beaker.
Wrapping Up the Lab
When students are finished with the lab, it’s important for them to clean up and to analyze their results or data.
For this lab, I like to ask questions such as:
Was your hypothesis correct? Explain.
How does this model convection currents?
How do you think convection currents move in the (atmosphere, earth’s mantle, ocean)?
Wrap Up
Teaching convection currents is ongoing and fun! This lab will really help students understand how convection currents work. We went over when we would teach convection currents and how to use this lab in your classroom. You can get the Convection Lab in my TpT store.

Your Turn
What are ways you teach convection currents? Is there anything new you will try? Reply and let me know!


One Comment