

2 Simple Steps for an Effective Science Classroom Setup
I remember my excitement when I got my position as a middle school Science teacher, walked into my new classroom, and started dreaming of my science classroom setup. My new classroom was an oddly shaped room. It wasn’t a square or a rectangle, more like a weird pentagon. There were large tables for the students to sit at. I could fit 32 or more students in the classroom. There were some storage cabinets and one sink. Even though it wasn’t an actual Science lab, I knew it needed to be effective. You might understand too, if you teach from this type of classroom. I’m fortunate now, because I am in a room with actual lab tables and a ton of storage. I will go over both examples to help you with your middle school science classroom setup.
In This Post
I will share two steps that will help you get your Science classroom set up and organized! First I will discuss different layouts. Then I will share some ways to start organizing all of those materials!
While you are setting up your classroom, think about how you will run it each day. Be sure to get your free guide 7 Daily Must-Do Routines to Run Your Science Classroom Like a Pro today!

Disclosure: This post contains some affiliate links for your convenience. As an Amazon Associate I earn from qualifying purchases with no cost to you.
How I used my elementary science classroom setup to help me that first year in middle school
I moved from teaching fifth grade (all subjects) to solely teaching Science in 6th grade. Thankfully, I came from a small classroom with desks, so I had a good idea about setting up a Science classroom. I knew I needed the kids to work independently and to work in groups. I knew there would be a lot of hands-on activities and labs in middle school, and I needed a way to manage this. So, I focused on two areas while planning my middle school science classroom setup- layout and organization.
Science Classroom Setup Step 1: Science Classroom Layout
If you’re new to teaching or are a veteran teacher, you understand how important the layout of the room is to your classroom management. Whether you have desks or tables, your science classroom layout must allow you to monitor students as they are working, allow them to work independently or with their peers, and must be safe for both students and staff.
Types of Layouts
Whether you have desks or tables, you must ask yourself some questions.
- What arrangement is best for my teaching and management style to ensure that all students are engaged in their learning?
- What arrangement is best so students can work together or alone?
Rows
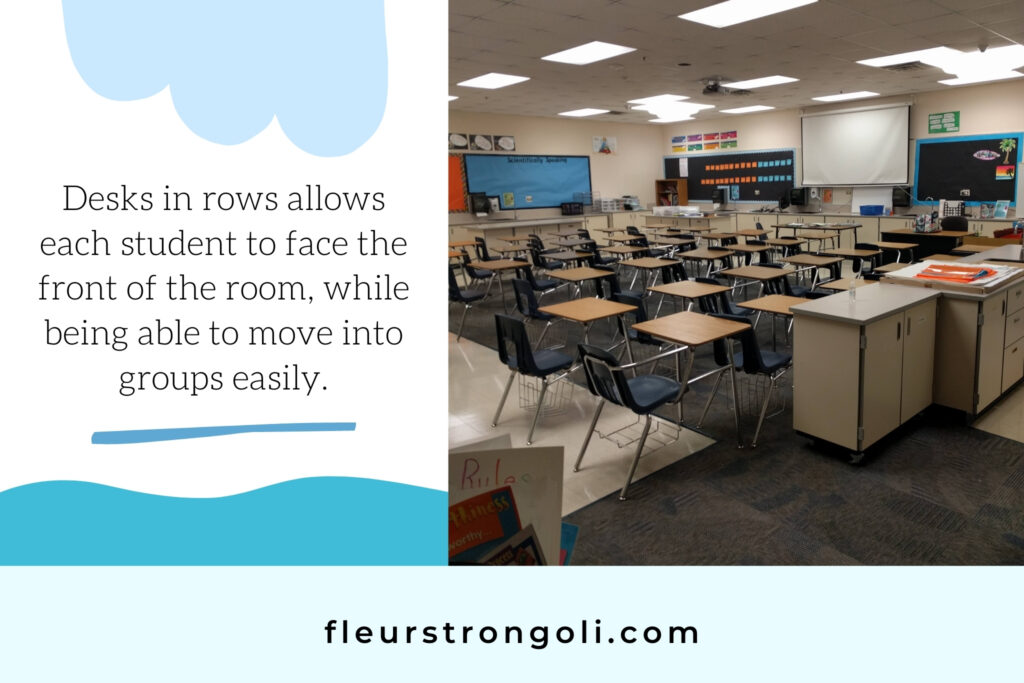
There are different types of layouts. The most common is rows. This allows all students to face the direction of the room you choose, such as the board. You’re able to see all faces and quickly manage behaviors. You’re also able to walk around easier to monitor the students.
This is how my current classroom is set up now. I have the desks in rows, facing the front of the room. The lab tables are around the perimeter of the room. I have trained my students to move their desks into groups of four when I want them to interact and work as a group. They can also scoot their desks together to work as a pair.
Groups
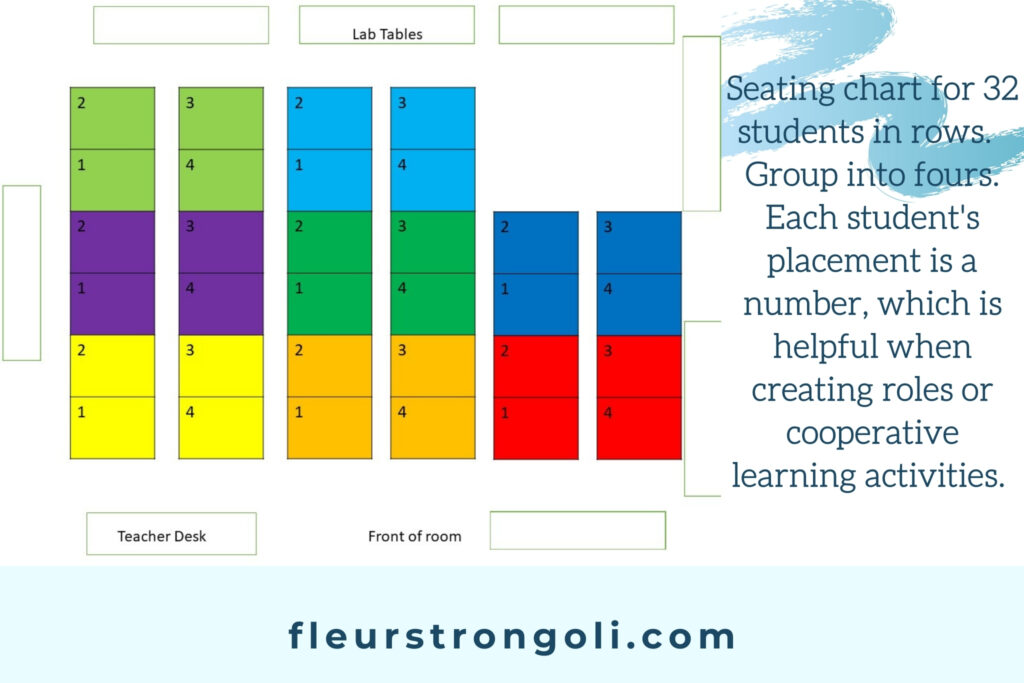
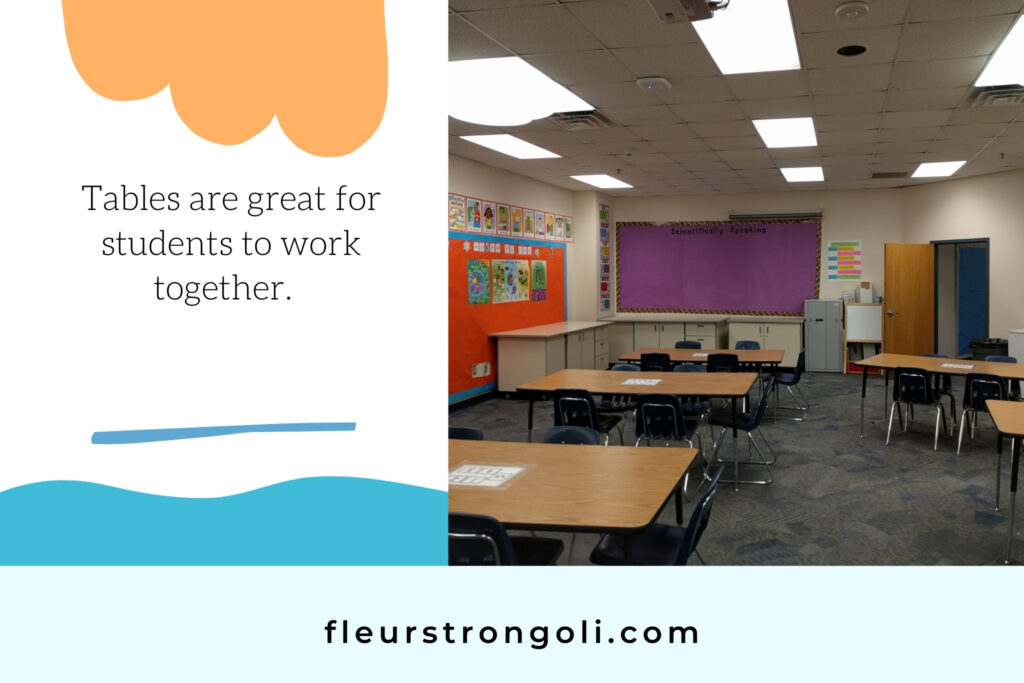
Another layout is grouping the desks, or using tables. In this layout, students are sitting together in groups. If possible, seat up to four students in a group. I personally find groups of four more manageable for me when it comes to planning activities, but also for the functioning of the group itself. Each student will have some kind of responsibility within that group. If you must have a larger group, try to have 6-8 at the table. Then you can divide it into two working groups, even though they are sitting together.
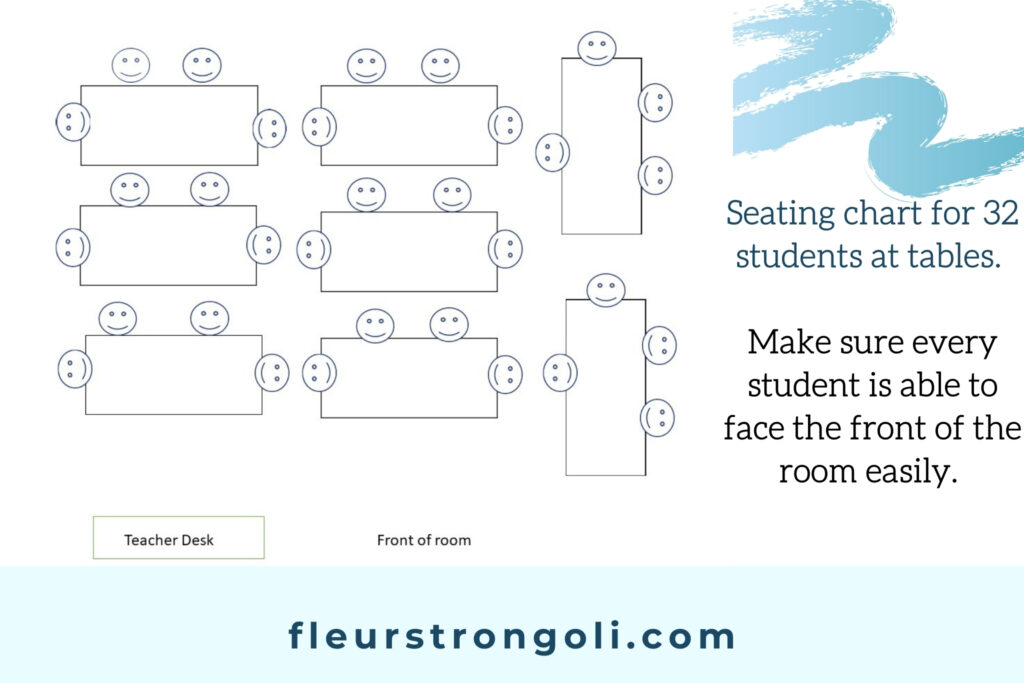
In my first classroom of tables, I arranged them in diagonal rows. They all faced the front, but were sitting together in groups. The tables were different sizes, so I was able to fit 4-6 students at each table.
I have also set up groups using desks in my current classroom. Since we have the middle school desks with the bar on one side, I had to get creative. My elementary desks were easier to physically group. So, I like to set two desks facing the front (at the top of the group) and the other two desks facing each other. That way, I have no students’ backs facing the front of the room.
Working in groups
Now that you’ve thought about the best arrangement for your science classroom, how will this allow students to work together?
Let’s start with the easy one- lab tables. If you’re fortunate like I am now, you have an area for teaching students (their desks), and an area for labs (counters and lab tables). My desks are in the center of the room, and the counters and lab tables are around the perimeter of the room. I have eight stations with sinks. When my students work together on labs or other assignments, they work at the lab stations. After teaching these procedures, I let each group know where they will be working. Materials are usually at their lab stations ahead of time. Most times, they have to gather their own materials.
Now, if you don’t have lab tables or stations like I didn’t in my first classroom, how will you make this work? Good news- you can make it work! First, they need to be set up in groups. So, if your arrangement is “desks in rows”, simply teach the students to move them together into groups. Then, whether you have desks or tables, the students must have set procedures in place to work on labs or assignments together. They need a clear working area, so they must know how to clean up their table and belongings. They need to know to gather the necessary materials to work at their table. So, while you might want to set up their tables ahead of time, with this arrangement, it is easier to train students to set up for you.
Science Classroom Setup Step 2: Organizing Materials
Now that you’ve got your desks or tables arranged, you have to make sure your materials are organized. In a Science classroom, you will likely have a ton of different materials. Just like any classroom, it’s best to organize it by type of material, and decide whether students will have access to it. Bins or boxes are great ways to hold your supplies.
Sort your materials
Moving classrooms or the start or end of the year is a great time to organize. Organizing is really messy at first, but so worth it! I like to organize as often as I can, because it’s always an area for improvement. Here are some steps to organizing all of your Science materials and other classroom supplies.
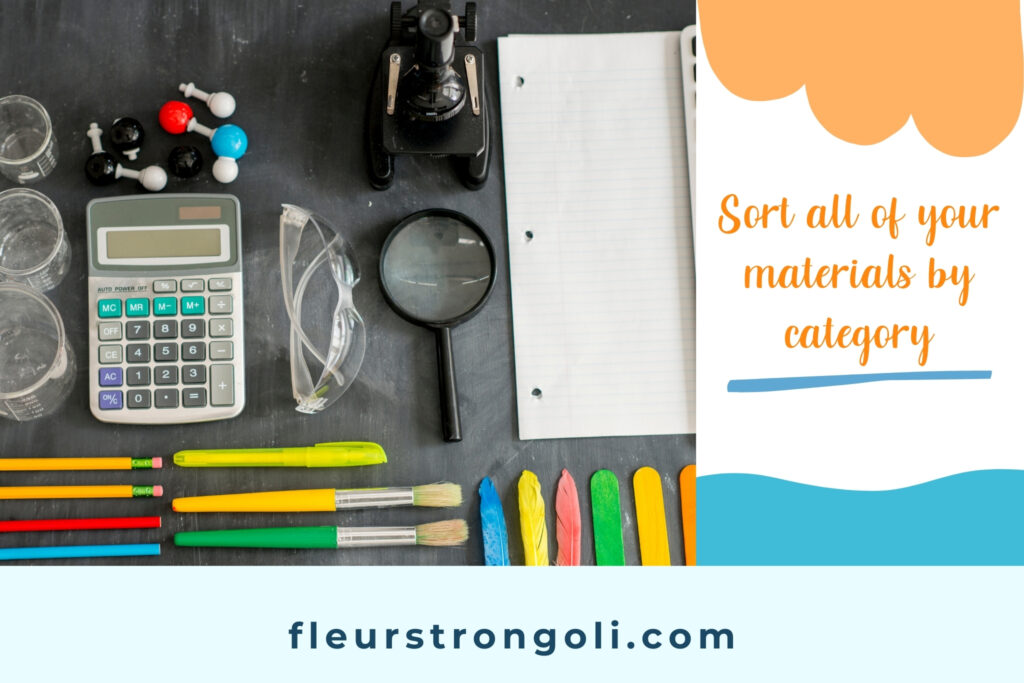
Sort by Category
First you will want to pull everything out of the cabinets and off the bookcases and make a mess! Next you’ll sort them. I sort my materials into very broad groups: science materials, grocery store materials, classroom supplies, and my supplies.
- Science materials include your equipment that is provided by the school or district. This would be the microscopes, graduated cylinders, beakers, agar, slides, trays, and test tubes. This includes all of your safety materials too, such as safety goggles and beaker tongs.
- Grocery store materials are those items you use for Science, but can be purchased at the grocery store. Sort your cups, plates, toothpicks, ziploc bags, foil, wax paper, and food-grade items like vinegar, oil, or baking soda.
- Classroom materials include things you want your students to have access to such as paper, books, pencils, markers, or glue.
- Your supplies are your things that you don’t want students to necessarily have access to. These are your teaching materials, posters, cardstock, art supplies, games, and personal belongings.

Storage Containers
Once you have everything sorted out, you can determine what type of storage containers to use. I find it helpful to put my materials in bins. I prefer plastic containers like these on Amazon, because I’m not a cardboard person. I like to choose colors that match my classroom color scheme and decorations. I get my bins from the dollar store, Target, Amazon, and IKEA. But, if you have a lot of shoe boxes or can ask for shoe box donations, then those would make great storage containers. Put your like materials in a box or bin and label it.
When you store your materials on your bookshelves or in cabinets, be sure to group and label them. It will make finding your materials that much easier. My personal and teaching materials near my desk. The classroom materials are in an area where students may frequent and will have easy, safe access. I have my science materials in cabinets in an area that is accessible. And I keep the grocery store items in cabinets near each other. Not only does grouping them help you find your materials easier, it also helps when you need to take inventory.
Using your middle school classroom setup
Once you’ve set up your room, give yourself a big hug! That was a lot of work! Before the students come in, add your own personal touches to make your room inviting. Then have your procedures in place and teach them to your students. This will ensure you have a smooth year in your organized, functional, and student-friendly science classroom.

Share below or on Facebook about your classroom set up tips or questions!
Read More and Links
3 Essential Components for Science Classroom Management
Design Tips for Science Learning Spaces
5 Simple and Cheap Tips for Staying Organized in the Middle School Classroom from my friend Amanda at The Sci-Ed Teacher
Fleur’s Favorite Resources – here are some materials I use in my classroom


Thank you, I found this blog post to be helpful. I especially appreciated the sections that reviewed the pros and cons of different layouts. My favorite is the flexible seating option for rows that transfer into groups for collaboration.
Thank you Amanda! That’s my favorite too, especially in a middle school classroom.